BizTalk 2010 will include functionality which will allow .NET developers to more easily leverage the WCF LOB adapters as well as the BizTalk Mapper. In this post I will focus on how to build a simple WCF Workflow Service which leverages the WCF LOB Adapter for SQL to query the database.
There may seem like there are a lot of steps, however, once you know what the steps are, this takes about 3-5 minutes to get up and running and requires very little code. After you have walked through the process, try creating a new project and building it again without following the steps below.
You will need to create a database named ‘Test’ with a table named ‘Customers’. The table should have three columns, ID, First, and Last. Fill the table with some sample data and we are ready to start.
Here is an overview of what we are going to do.
- Create a new WCF Workflow Service Application.
- Generate a WCF LOB Adapter Service Reference which created our Activity.
- Change the default data variable and added a new response variable.
- Wire up the activities to use our variables.
- Tested our application.
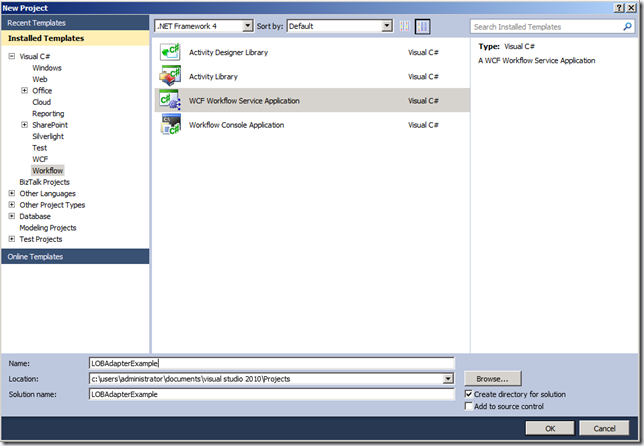
To get started, create a new WCF Workflow Service Application.
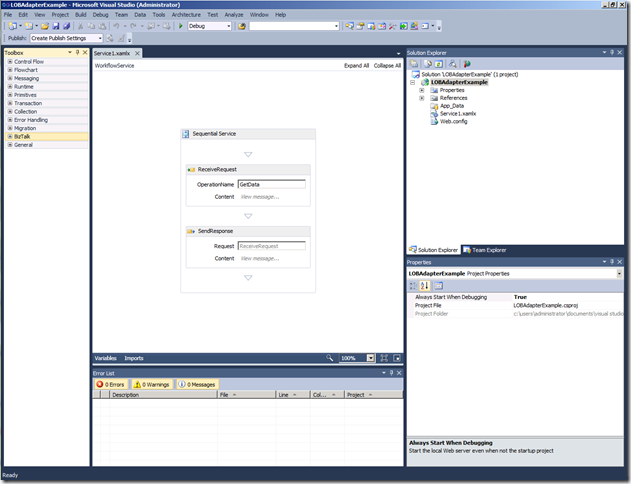
Once your project loads, you should see the Service1.xamlx workflow.
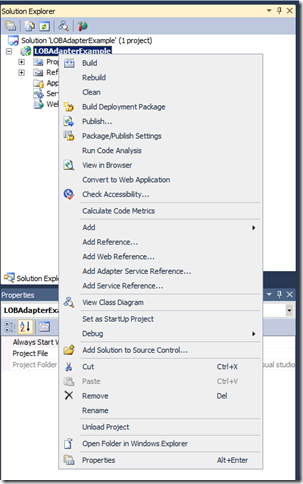
Next, lets add our adapter service reference. Right click on the project and select the ‘Add Adapter Service Reference’ option. This will open the WCF LOB Adapter dialog.
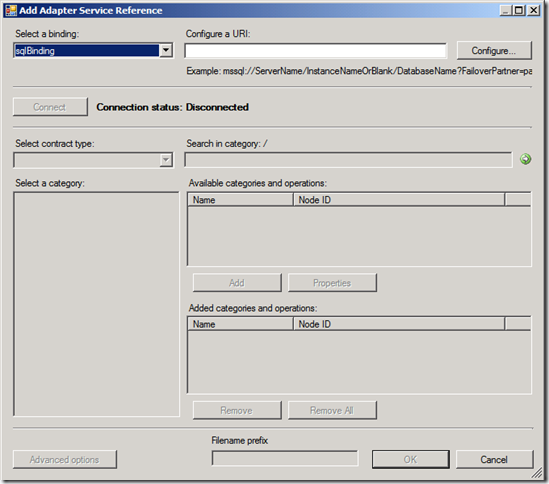
The Add Adapter Service Reference dialog give you access to all of the WCF LOB adapters installed on the Server. This is the same dialog you will use to generate a .NET proxy class, a BizTalk Schema, or in this case, a WF Activity.
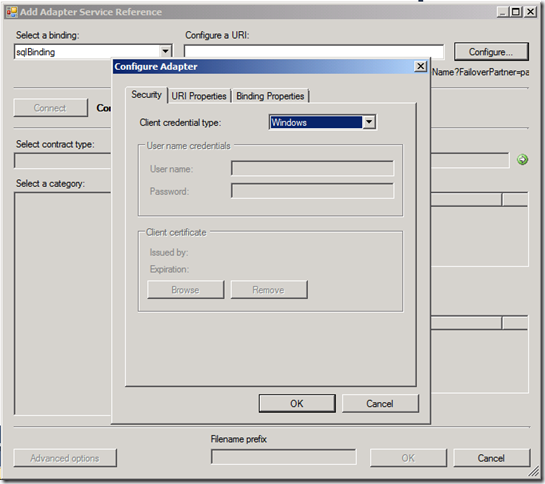
Once you have picked the sqlBinding, click the Configure button. This will open the Configure Adapter Dialog. This allows you to set the security and URI properties.
For security, we are going to select ‘Windows’ as our credential type.
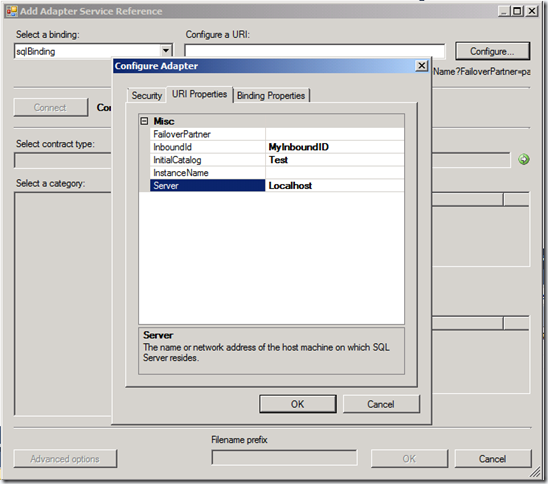
Next we need to set the URI properties. We need to set the InboundId, the InitialCatalog, and the Server. The InboundId is used to differentiate one receive location from another and can be anything as long as it is unique. The initial catalog is the name of your test database and the server name is simply the name of the server where your database lives.
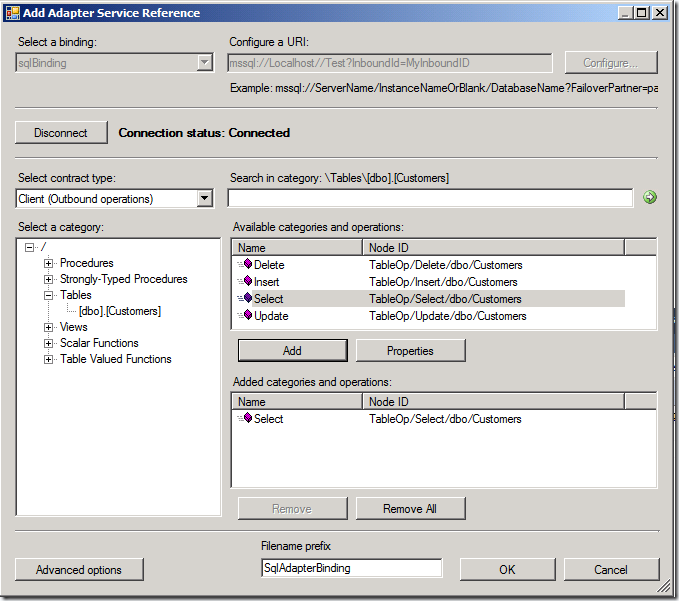
After you click OK, you will need to click the ‘Connect’ button. This will query the database and pull back meta data. You browse through the meta data and select the operations you would like to include in your proxy. In our case, we are going to leverage the select operation on our Customer table.
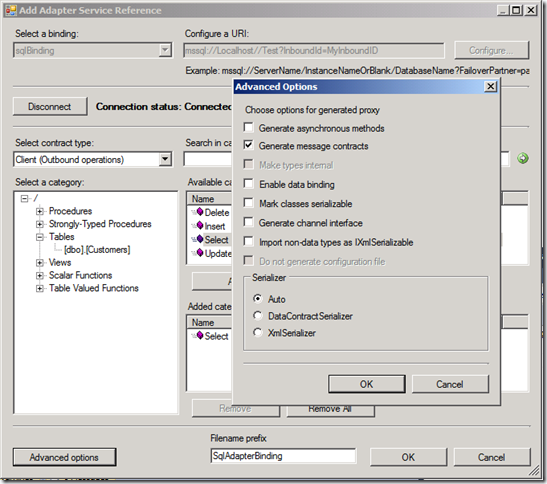
Before we click OK, we need to select an advance option. We need to have the wizard generate message contracts.
The process may take a little while to generate the appropriate artifacts, so be patient. When the process is complete you will see the following message.
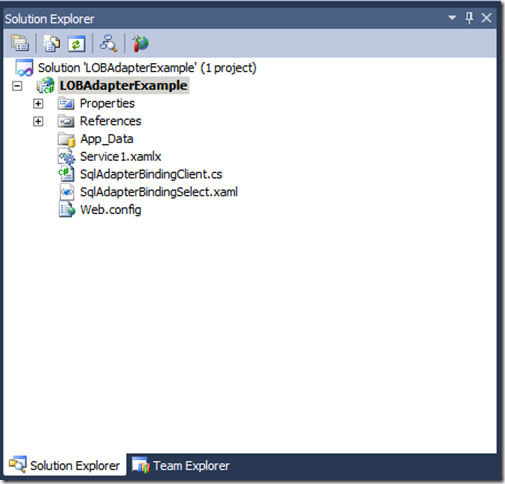
You will see two new files within your solution. A Adapter Binding class file and a xaml file. The class file contains all the proxy classes, the xaml file contains the activity.
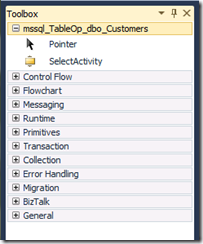
To see the activity in the toolbox, you will need to rebuild the project. Once rebuilt, the SelectActivity should appear.
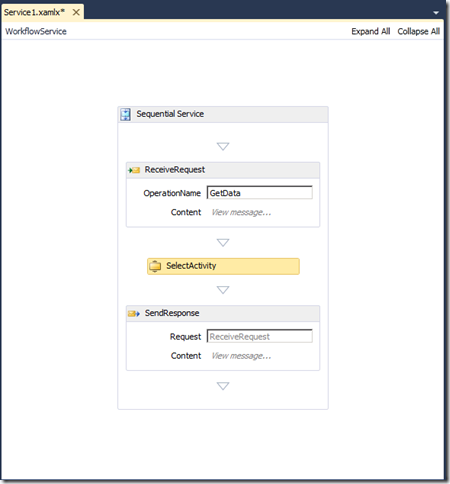
Drag the activity onto the WorkflowService and drop it in-between the ReceiveRequest shape and the SendResponse shape.
At this point, we have generated everything we need. We need to modify a variable, create a new variable, and then wire everything up. Almost done.
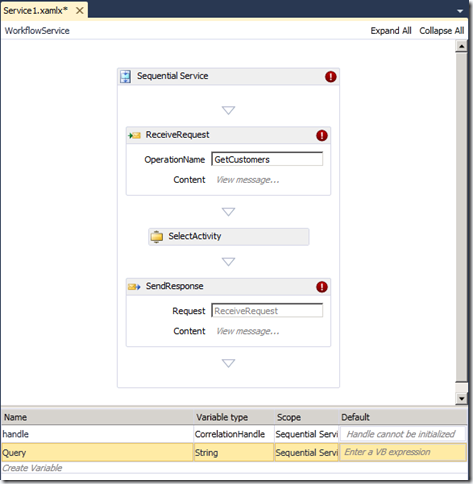
If we take a look at the default variables, we have a handle variable for correlation and a data variable.
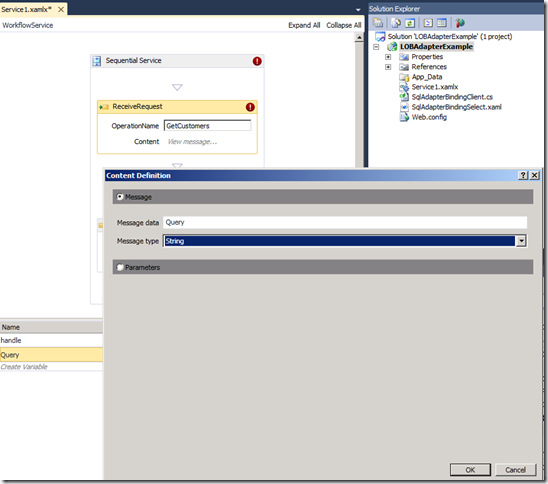
First we need to change the data variable. We want to rename the variable to ‘Query’ and change the type to String. This will cause some errors to appear on our workflow which is expected.
To fix the ReceiveRequest error, we need to click on the ‘view message…’ text within the ReceiveRequest activity. This will open the content definition dialog. We need to change the message data expression from pointing at the data variable to the ‘Query’ variable and change the message type from int32 to string.
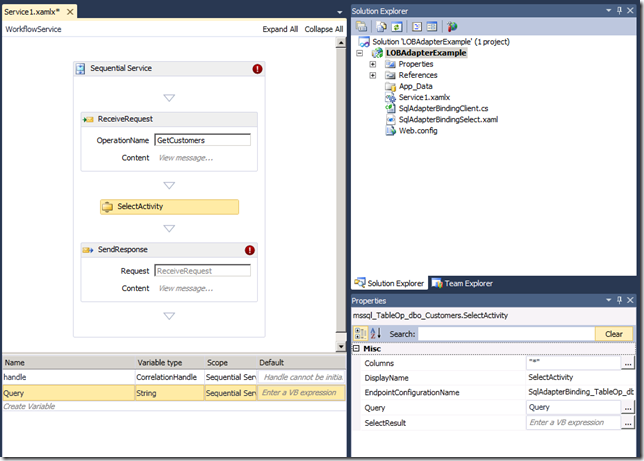
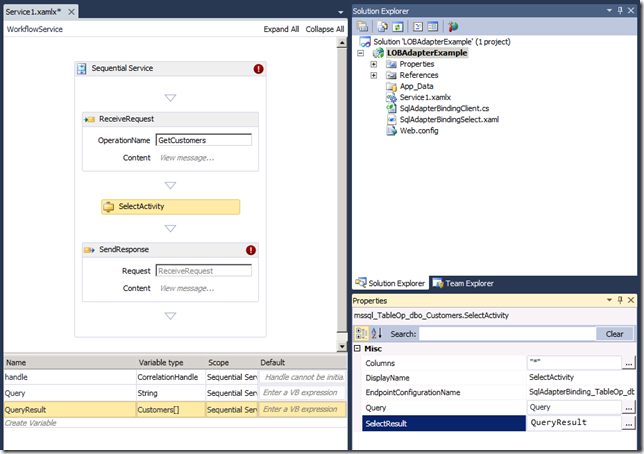
This will correct the problem with the ReceiveRequest activity. Now lets edit the properties on our SelectActivity to leverage our ‘Query’ variable so we can pass the Query we receive from the ReceiveRequest activity to the SelectActivity.
To do this, simply view the properties on the SelectActivity and change the Query property to be Query which is our variable.
Also, set the columns property to “*”. This will tell the adapter to retrieve all the columns in our table.
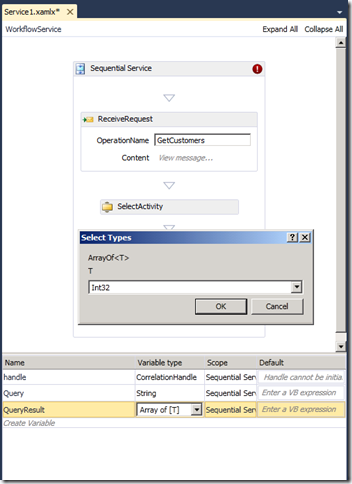
Time to create the variable which will contain our results from the SelectActivity and be the response message back to the client. Create a new variable called QueryResult. Set the Type as Array of [T]. This will open another select types dialog, pick browse for types as your option.
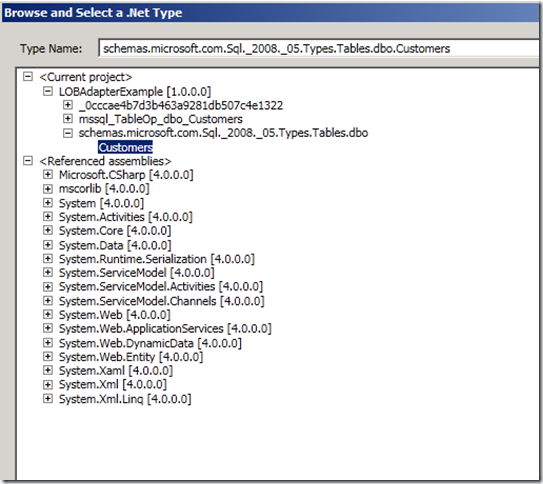
This will open a list of available types, we want to pick the Customers Type. This will set the QueryResult variable as an array of customers.
When done, here is what our variables should look like.
Go back to the properties on the SelectActivity. We need to set the SelectResult property to our QueryResult variable. This will take the response we get from the WCF LOB adapter and pass it into our QueryResult variable.
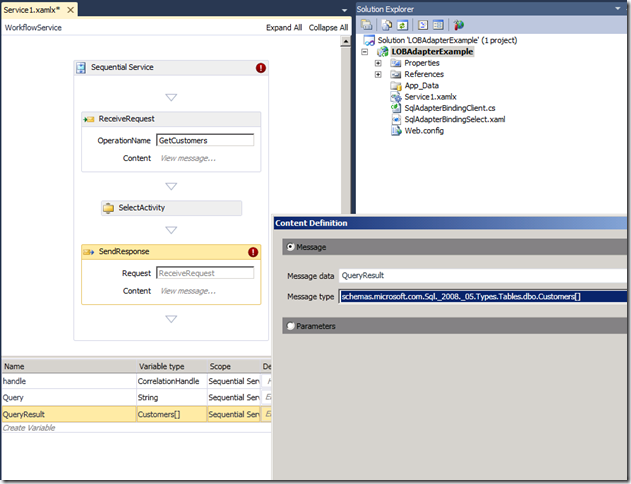
Last step. We need to change the SendResponse activity to use our QueryResult variable. To do this you need to click the ‘View message…’ text within the SendResponse activity. This will open the Content Definition dialog.
We want to set the message data to QueryResult and the Message type to an array of customers.
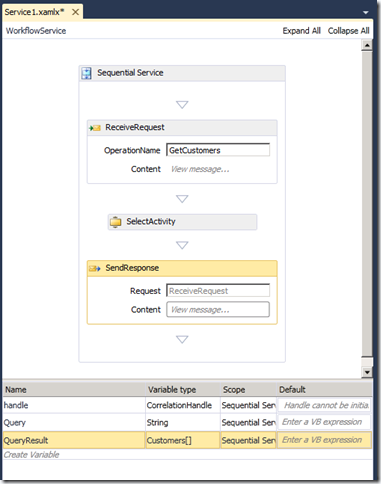
You should be done and your screen should look like the following.
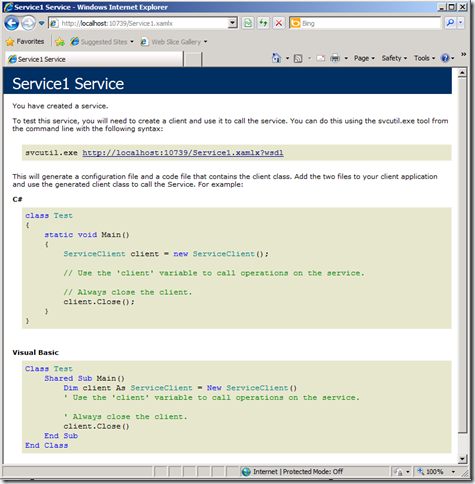
If you start the project in debug mode your service will start. When you browse to the service you should see the following.
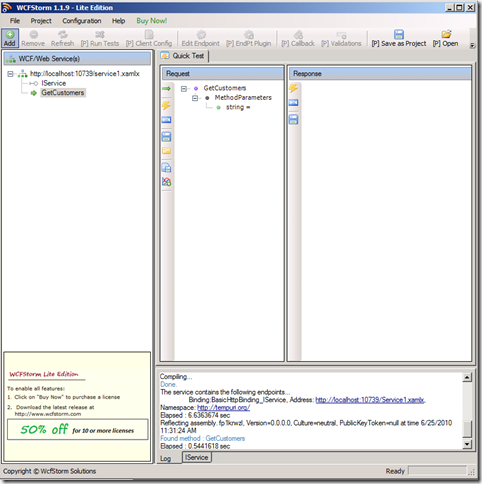
I typically like to use WCFStorm to test my services. Once you have opened the service in your test tool of choice, you should see a GetCustomers operation which takes a string as the input.
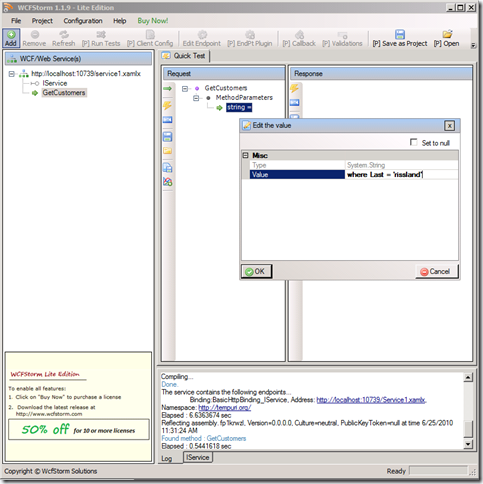
We want to enter our where clause as our string.
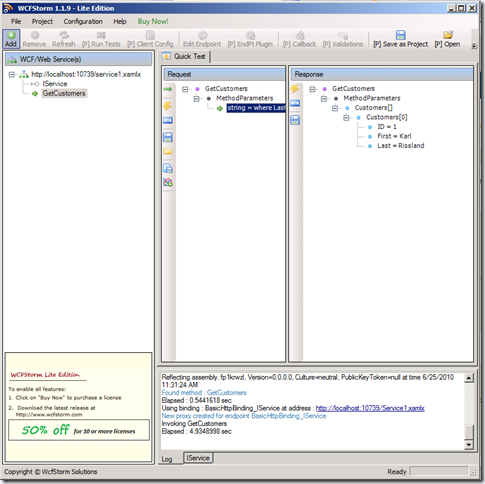
After you invoke the service, your response will contain the matching records.
Again, lots of steps, but in reality this takes only a few minutes to setup and get working once you know where everything is.
A quick recap.
- We created a new WCF Workflow Service Application.
- We generated a WCF LOB Adapter Service Reference which created our Activity.
- We changed the default data variable and added a new response variable.
- We wired up the activities to use our variables.
- we tested our application.
In my next post I will show how to package the service and deploy it to AppFabric and show you some of the manageability features provided by AppFabric.



Hi,
When generating a WCF LOB Adapter Service Reference the xaml file does not get created and no new Activities show up in the Toolbox.
Any idea what might be the problem?
Br,
steinar
You need to build the application before the adapters will show up as activities. There is a small dialog that shows up which says that you should, but, it is easy to miss. Let me knos if this fixes your problem. Good luck, Karl
I did build the application without any luck. The dialog you mention did not show up either.
Br,
steinar
Interesting. Do you see the BindingClient.cs and BindingSelect.xaml files created by the adapter?
Is the workflow you are trying to consume the adapter from in the same project?
Only the BindingClient.cs gets generated not the .xaml file.
Yes it’s all in the same project.
Tried creating a Workflow Service Application and Workflow Console Application and they both had the same results.
I’m running VS 2010 on a Windows 7 x64 bit machine.
Have the WCF LOB Adapter SDK SP2 and BizTalk Adapterpack 2.0
If the XAML file isn’t getting created then you won’t see the activity. The creation of the XAML file is something new with the beta version of the WCFLOBAdapter pack. You would have had to download all the beta versions from http://www.microsoft.com/downloads/details.aspx?FamilyID=0f852e77-f792-4784-b2d4-95113d40db64&displaylang=en. If you don’t have the beta versions of the SDK and the adapter pack you won’t get the XAML file.
Also, since you are running on a 64 bit machine, you will need to install both the 32bit pack as well as the 64bit pack. It is documented in the readme along with an explination. The adapter pack readme also covers a couple of issues that may crop up with the beta, essentially install order.
Let me know if that works.
Also, if you have something else you would like to see on the Blog, let me know, I have lots of ideas but that doesn’t matter if no one is interested.
Karl
Nice simple article Karl. For Steinar issue, did you install both 32bit AND 64bit of adapter pack? I’ve run into issues if you don’t install both, because Some apps, including VS.net are not true 64bit apps, thus look in the 32bit locations for their configurations.
HTH
Yes, I had to install both the 32bit components and the 64bit components in order to get development to work correctly. In production you don’t have to do this.
Hi Karl,
I have been trying to figure out how I can set the LOB Adapter credentials into to config file. When using the SQL adapter I can grant the AppPool user access to the SQL Server but I’m lost when it comes to SAP.
Some mention that it is possible to set the user pass in the URI or create some custom code for it.
What options do I have once the service has been deployed to AppFabric?
-steinar-
Steinar, great question. This was on my list of things to blog about, but my day job keeps getting in the way. OK, so here is how I thought I would solve that problem. When you generate the adapter, it actually creates a .xaml file. This is your activity that you can reuse. It just so happens that you can open this activity and edit it. The sequence is pretty straight forward. You have a send shape followed by a ReceiveReply shape, followed by an Assign shape.
When you click on the send shape and view the properties, you will see the properties for the endpoint address, endpointconfiguration name, etc. You also have acess to the raw xaml behind the graphical designer as well as the proxy class which is managing the communication with your LOB system. So while it isn’t OOB, you could easily have your Adapter within WF pull configuration from something other than the config file.
Another option, BizTalk. BizTalk allows you to surface all the configuration in an administration console and gives you more capabilities that AppFabric. i.e. this is a core feature of BizTalk.
Hope that helps.
Karl
[…] Comments (RSS) « Using BizTalk WCF LOB Adapters within WF […]